
Hey there!
I have another DIY post for you today and its one I’m very excited to share with you! I saw these jars on Pinterest (is there anything that you can’t find on Pinterest?) and fell in love! I just had to share this tutorial with you all!
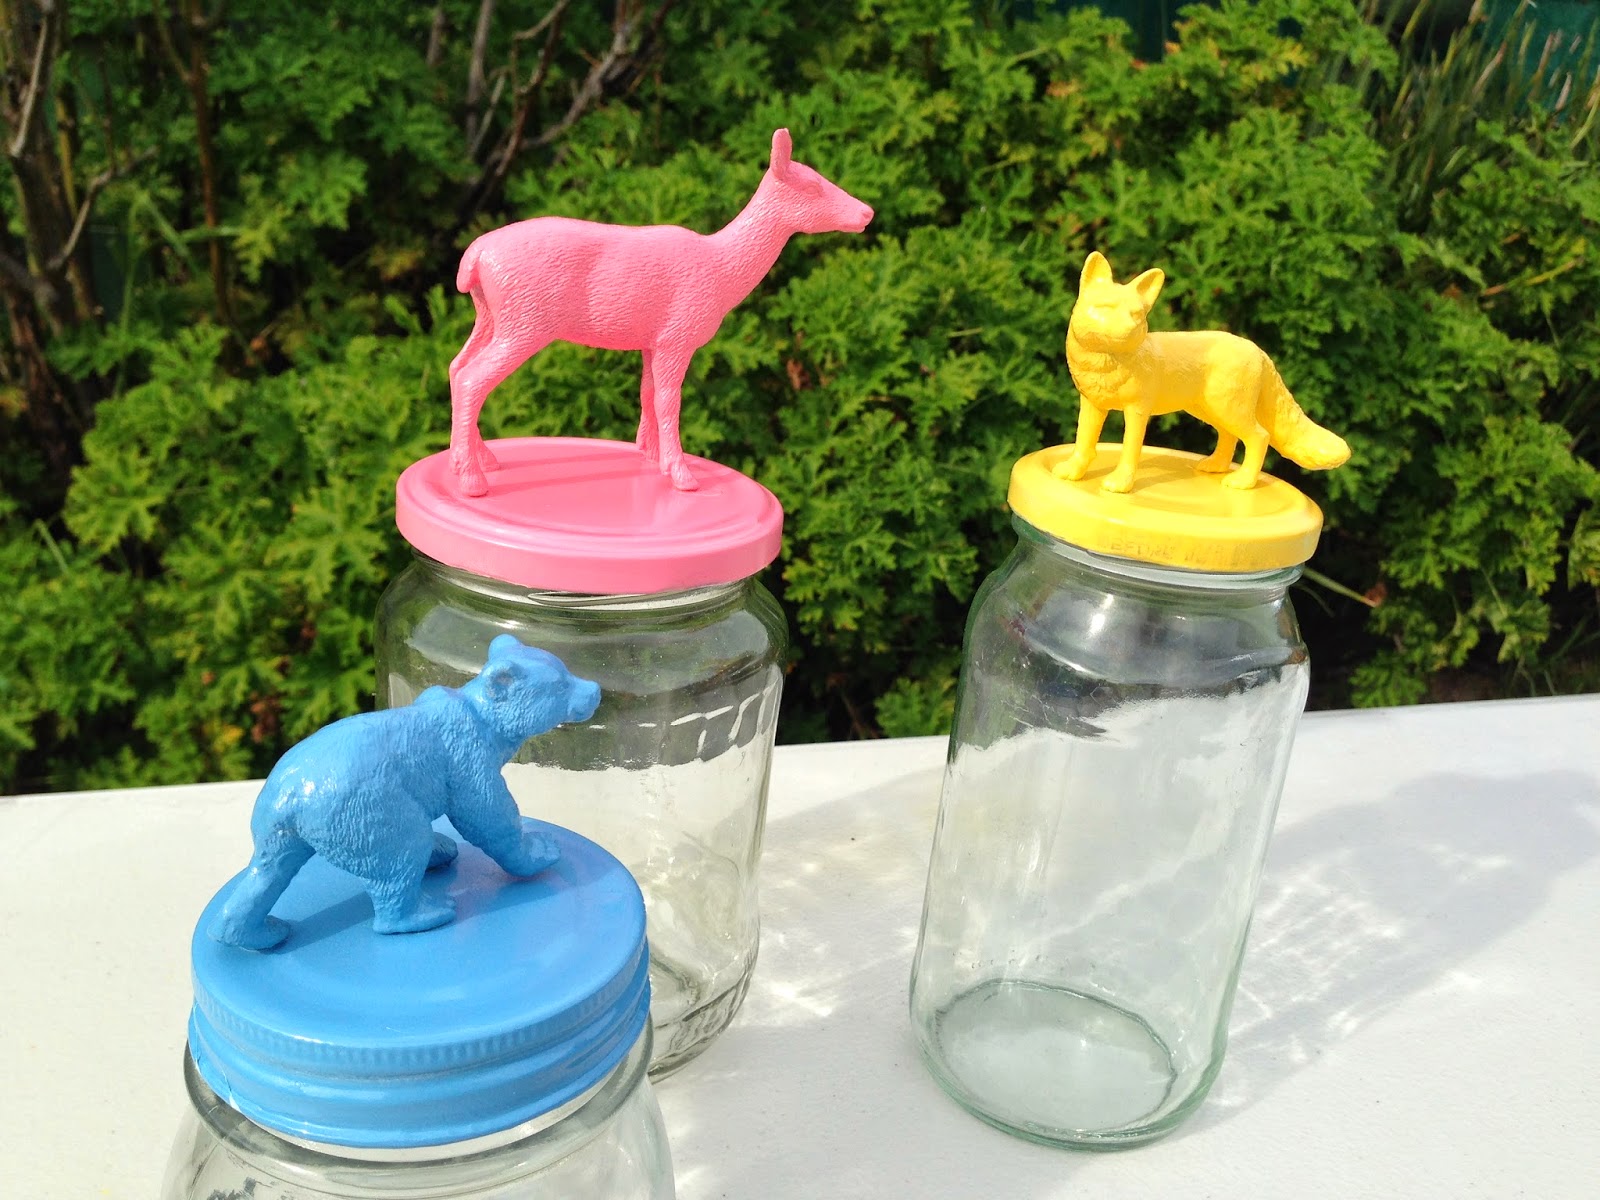
For this project you will need:

- Assorted sized glass jars with flat lids. (I used old pickle and pasta sauce jars)
- Assorted plastic animal figurines (You can purchase these from any toy store.)
- White spray paint primer (Make sure you use one that will bond to the metal as well as plastic.)
- Spray paint in colours of your choice
- Strong glue that will adhere to metal and plastic.
Let’s begin!

Step 1: Soak the jars in warm water and soap until the labels start to peel off. Scrape off any remaining residue from the labels. If you are using jars that don’t have labels, you can skip this step.


Step 2: Prime the lids using your spray paint primer. One coat should cover it, but a second coat may be necessary if the paint appears streaky. Make sure the paint is fully dry before moving on to the next step.

Step 3: Now lightly spray the lids at all angles with the coloured
paint to get a light even coverage. For lighter shades, you may need to do 2 coats so the colour comes out opaque. Allow time for the
paint to fully dry.

Step 4: Using your glue, stick the figure to the centre of the jar lid. Again, allow drying time.

Step 5: Fill your jars with whatever you like..


The possibilities are endless!
These jars look adorable in the home and they were so easy to make! They’d also make great gifts when filled with little treasures! If you try these, be sure to show me pictures by tagging me on Twitter or on Facebook! I’d love to see how they turned out!
Happy Crafting
Love Megan xo
These are so adorable! Will definitely bookmark for the future
ReplyDeleteThanks for reading, im so glad you enjoyed this post! xo
DeleteSuch a cute idea! Definitely have to try to make some of these for my desk :)
ReplyDeleteEmily xx
emilymaydesigns.com
Let me know how they turn out, id love to see!
DeleteThanks for having a read! xo :)
Oh my goodness these look absolutely amazing! It's such a simple idea but looks brilliant.
ReplyDeleteI'm definitely going to look through more of your DIY tutorials!
Rachael at broomfie.blogspot.com
Thanks lovely! I'm glad you like them :)
DeleteI'll be sure to upload more DIY tutorials soon xo
These are adorable! Definitely going to give this a go!
ReplyDeletechanteldione.blogspot.co.uk
Oh I hope you do! Please let me know how they turn out if you make them!
DeleteThankyou so much for taking the time to have a read, its greatly appreciated! Have a fantastic day xo